Where I Started

This is how my Roadrunner looked when I bought it
Thursday, March 8, 2018
Thursday, September 29, 2011
Cutting away the rust
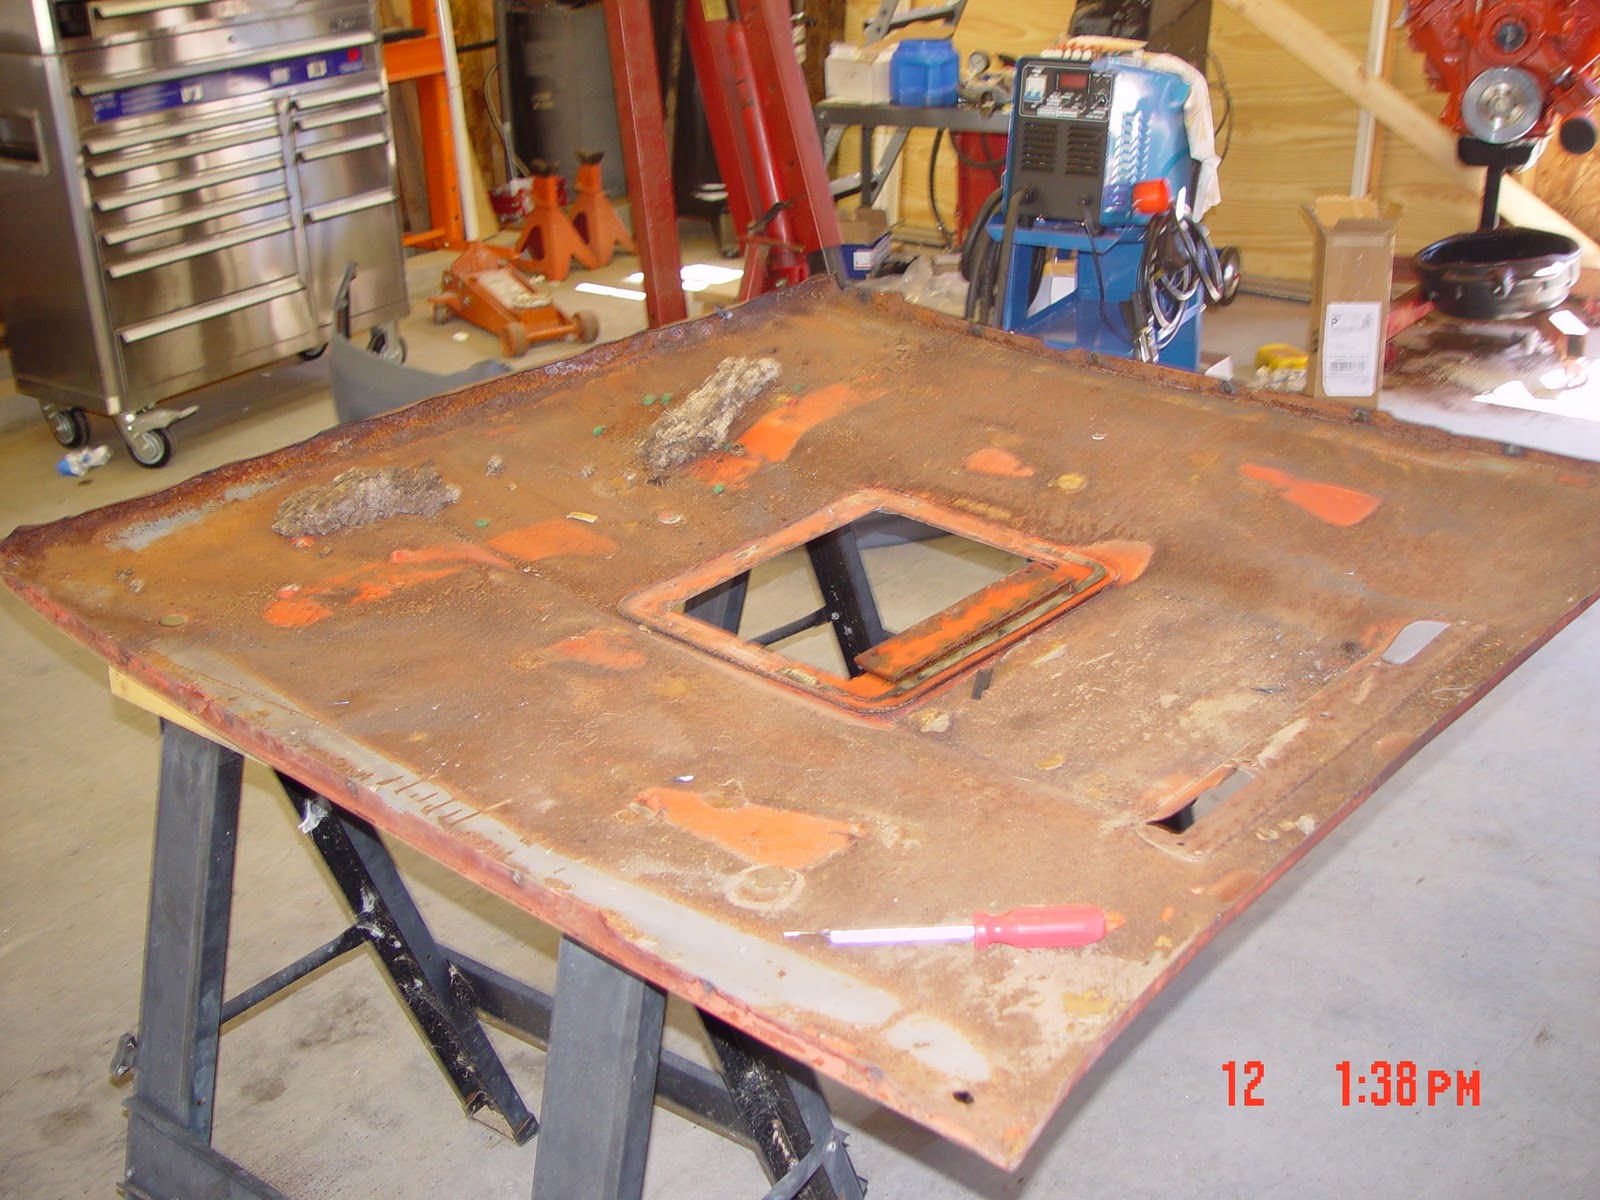
I'm finaly starting to "work" on the car. As you saw in the previous post there is a lot of rust to be removed.

I started with the Deck filler panel. I cut out the inside to expose the supports and weld points

As I have stated earlier, I am not a professional body man, if you know a better way to do something let me know.
Next I cut out any of the metal that was not at a weld point.

I used a grinder to remove the remaining metal.

 Cutting out the quarter panel.


Wednesday, September 14, 2011
Time to get started
I finally have some free time to get started with the tear down on my car. I got it in the shop and started the disassembly process.
Since I'm getting older and a little forgetful I am taking lots of pictures so I can remember how it goes back together.


Since I'm getting older and a little forgetful I am taking lots of pictures so I can remember how it goes back together.

I am putting all of the small parts and fastening hardware in zip lock bags and labeling them.

I have learned from experiance that you should never assume that all parts are available, so I keep all of the parts that I removed. The 70 body style is a 1 year. No one is reproducing the front fenders.
(that I have found)


The next three pictures shows some of the rust that has to be removed from around the rear window.


The left lock pillar post will need to be replaced, it's had some work done before and the nut plate is welded in place.

Friday, March 25, 2011
So many cars, so little time.
When I finished the hood I had to put my restoration on hold. I had three other more pressing projects to complete.
I had bought a wrecked Tiburon to repair and I had to paint my son’s car and girlfriend’s truck.
The Tiburon is to be my work car, I drive allot of miles for work and needed a car that wasn’t too expensive.
My son’s car and my girlfriend’s truck needed to be painted. They both were suffering from what I call EPA disease. In the early to mid 90’s the EPA forced the auto manufacturers to reformulate paint to reduce VOC’s (volatile organic compounds) this caused a problem with adhesion between the primer and topcoat. I’m sure you all have seen cars driving around with the paint falling off; well you can thank the EPA for this.
The Tiburon

 After
After
 My son's car
I didn't take any before pictures, but here is one when we were stripping it.
 Drying

And finished

I don't have any pictures of the truck.
I had bought a wrecked Tiburon to repair and I had to paint my son’s car and girlfriend’s truck.
The Tiburon is to be my work car, I drive allot of miles for work and needed a car that wasn’t too expensive.
My son’s car and my girlfriend’s truck needed to be painted. They both were suffering from what I call EPA disease. In the early to mid 90’s the EPA forced the auto manufacturers to reformulate paint to reduce VOC’s (volatile organic compounds) this caused a problem with adhesion between the primer and topcoat. I’m sure you all have seen cars driving around with the paint falling off; well you can thank the EPA for this.
The Tiburon


I didn't take any before pictures, but here is one when we were stripping it.


And finished

I don't have any pictures of the truck.
Wednesday, January 19, 2011
The Air Grabber Hood
They think they are sitting on a gold mine. 4000.00 dollars for a hood that is in only fair shape is nuts. For that kind of money it should be ready to bolt on.

I found this hood on Craig's list. It is complete, but the underside has lots of rust holes. To many to fix.

I figured the best way to fix it was to take two hoods and make one. I separated the skin from the under hood support.

I ground off the spot welds.

and separated the two pieces
Here's the hood skin after it was separated.

Here is a better look at the support, if you click on the picture you'll get a better look at the rust.


I then sandblasted all of the surfaces

Here's the hood support primed. The silver at the top is weld through primer.

A previous owner had drilled holes at the back of the hood, for hood pins I guess. these needed to be filled.

I squared the holes and cut pieces from the old hood. Then I welded them in.

Here's the hood welded back together and ready for the repair to have a thin coat of filler put on.
Thursday, January 13, 2011
Engine Assembly


The pistons going in. These are Hypereutectic pistons, They are favored because of reduced scuffing, improved power, fuel economy and emissions.

The heads are on, notice the new springs. The timing set is a standard set, but there was a little to much play for my liking.

The heads and rocker arms are on. I used the standard rocker arms.
The timing set has been replaced with a Comp Cams double roller set. Much tighter than the stock set.
Notice the gray paint flaking off.

The water pump and housing is installed. They came from 440 Source. I got the one with their logo on it and they gave me $10.00 dollars off.
The valley pan is on and I'm taping the intakes with painters tape to keep the junk out.

I set the intake and valve covers on for this picture. I also test fit the harmonic balancer.
This is an SFI certified fluid balancer from 440 Source.

After thoroughly sanding the engine I painted it with ceramic paint

The carburators and distributor are installed. I picked up the carbs at a swap meet. The throttle shaft bushings were shot. I was able to talk the guy down to $100.00 a carb. I ordered new base plates direct from Holley. You can still get parts for these carbs from them. You can even buy brand new 6 pack carbs from them.
The distributer is an electronic unit that works with the stock setup, no ignition box required. I got it from, ya you guessed it, 440 source.


The linkage has been added to the carbs. I got The linkage and air cleaner from Fredericks Chrysler Jeep Dodge. They are no longer in business, a casualty of Chryslers down sizing. They got the Dodge dealer here also. I think Chrysler pulled their franchise more on the look of their building than their sales numbers. If you didn't have a new building you were gone. But that is a rant for later.

I put the headers on so I could finish the plug wires.


And the engine is done (for now)
Block

The block on the engine stand. The only bright spot in all of the trouble I had with the block and heads is that the bore was standard. I had it punched out .030 to clean it up. For some reason the machine shop decided to paint it with this gray paint and it didn't go on smooth. This will need to be removed before it is painted.
Subscribe to:
Posts (Atom)